
Node Images
NodePit draws the icon of every node, and you can get it as an image to use in your own documentation, wiki, or blog post. This page shows how to ask for one and what you can change about it.
Getting an image
Add /image and a format to the address of a node:
https://nodepit.com/api/nodes/io.qrocodile.api.designer.node.QrDesignerNodeFactory/image?imageType=svgThe API needs to know which format you want. Say so with the imageType parameter, or with an Accept header of image/svg+xml or image/png; a request with neither gets the status 406. In an address that you put into a page, use imageType: it takes precedence over the header, which a browser sets on its own.
Changing how it looks
These parameters change what the image looks like:
widthandheight— the size of the node in pixels. These only apply to PNG images.addNodeName— draws the name of the node below it, as KNIME does on the workflow canvas.executionState— draws the traffic light below the node ingreen,yellow, orred.canvasWidthandcanvasHeight— the size of the whole image. If the name does not fit, make the canvas larger.backgroundColor— a color name such aswhite, or a hex code. The background is transparent by default.
Sizes can be up to 2,048 pixels.
TIP
The icons are dark, so on a transparent background they disappear on a dark page, such as this one in dark mode. If you cannot be sure about the color of the page you embed an image in, set a backgroundColor.
Embedding an image
The address below embeds a labeled node with a green traffic light in a Markdown page, on a white background:
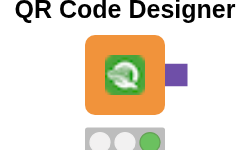Rendered, it looks like this:
The same address works in an <img> tag, so you can use the image without saving it first. To keep a copy, download it once and serve it yourself.